Cucumber, Cantaloupe, and Seared Halloumi Salad

IMG_3170.jpg

This here salad is my JAM. I’ve been getting the most amazing cantaloupes all summer (B’ham folks, I get them at Murphree’s Market)—better than they’ve been any other year I can remember. They are incredibly juicy, honey-floral sweet, and almost indecently fragrant. They are, with no exaggeration, swoon-inducing. And when paired with crisp cucumbers, pungent herbs, and warm halloumi cheese, they are the meal of dreams. Seriously, this salad with a glass of crisp white wine? My summer dream dinner!

Yield: 4 servings (serving size: about 1 1/2 cups)
Author:

Cucumber, Cantaloupe, and Seared Halloumi Salad

prep time: 10 Mcook time: 3 Mtotal time: 13 M
This simple salad celebrates the best of summer, when melons are at their juiciest, sweetest, most fragrant peak, herbs grow to thrilling heights in backyard gardens, and cucumbers offer extreme crunch with each bite. This pairs well with grilled fish or chicken, or stands up on its own for a light dinner—my favorite way to enjoy it. Well, with a very cold glass of white wine on the side, of course.

ingredients:

  • 1 1/2 Tbsp. extra-virgin olive oil, divided
  • 1 1/2 tsp. white balsamic vinegar
  • 1/4 tsp. kosher salt
  • 1/4 tsp. freshly ground black pepper
  • 6 thin cantaloupe wedges, halved crosswise
  • 2 Persian cucumbers (the mini cukes), shaved lengthwise into ribbons with a vegetable peeler
  • 4 oz. halloumi cheese, cut into 1/4-inch-thick slices
  • 2 Tbsp. small fresh mint leaves
  • 2 Tbsp. small fresh basil leaves (or larger leaves, torn)

instructions:

How to cook Cucumber, Cantaloupe, and Seared Halloumi Salad

  1. Combine 1 tablespoon oil, vinegar, salt, and pepper in a large bowl, stirring with a whisk. Add cantaloupe and cucumbers; toss gently to coat. Let stand 5 minutes.
  2. Heat a large nonstick skillet over medium-high heat. Add remaining 1 1/2 teaspoons oil; swirl to coat. Add cheese to pan; cook until nicely browned, 1 1/2 to 2 minutes per side.
  3. Arrange cantaloupe mixture on a platter; drizzle any juices from the bowl over cantaloupe and cucumbers. Arrange warm halloumi on platter. Sprinkle with mint and basil. 

NOTES:

Calories 199; Fat 13g (sat 6g); Protein 7g; Carb 15g; Fiber 2g; Sugars 12g (added sugars 0g); Sodium 392mg
Created using The Recipes Generator

Lady Pea and Tomato Salad

P1110285.jpeg

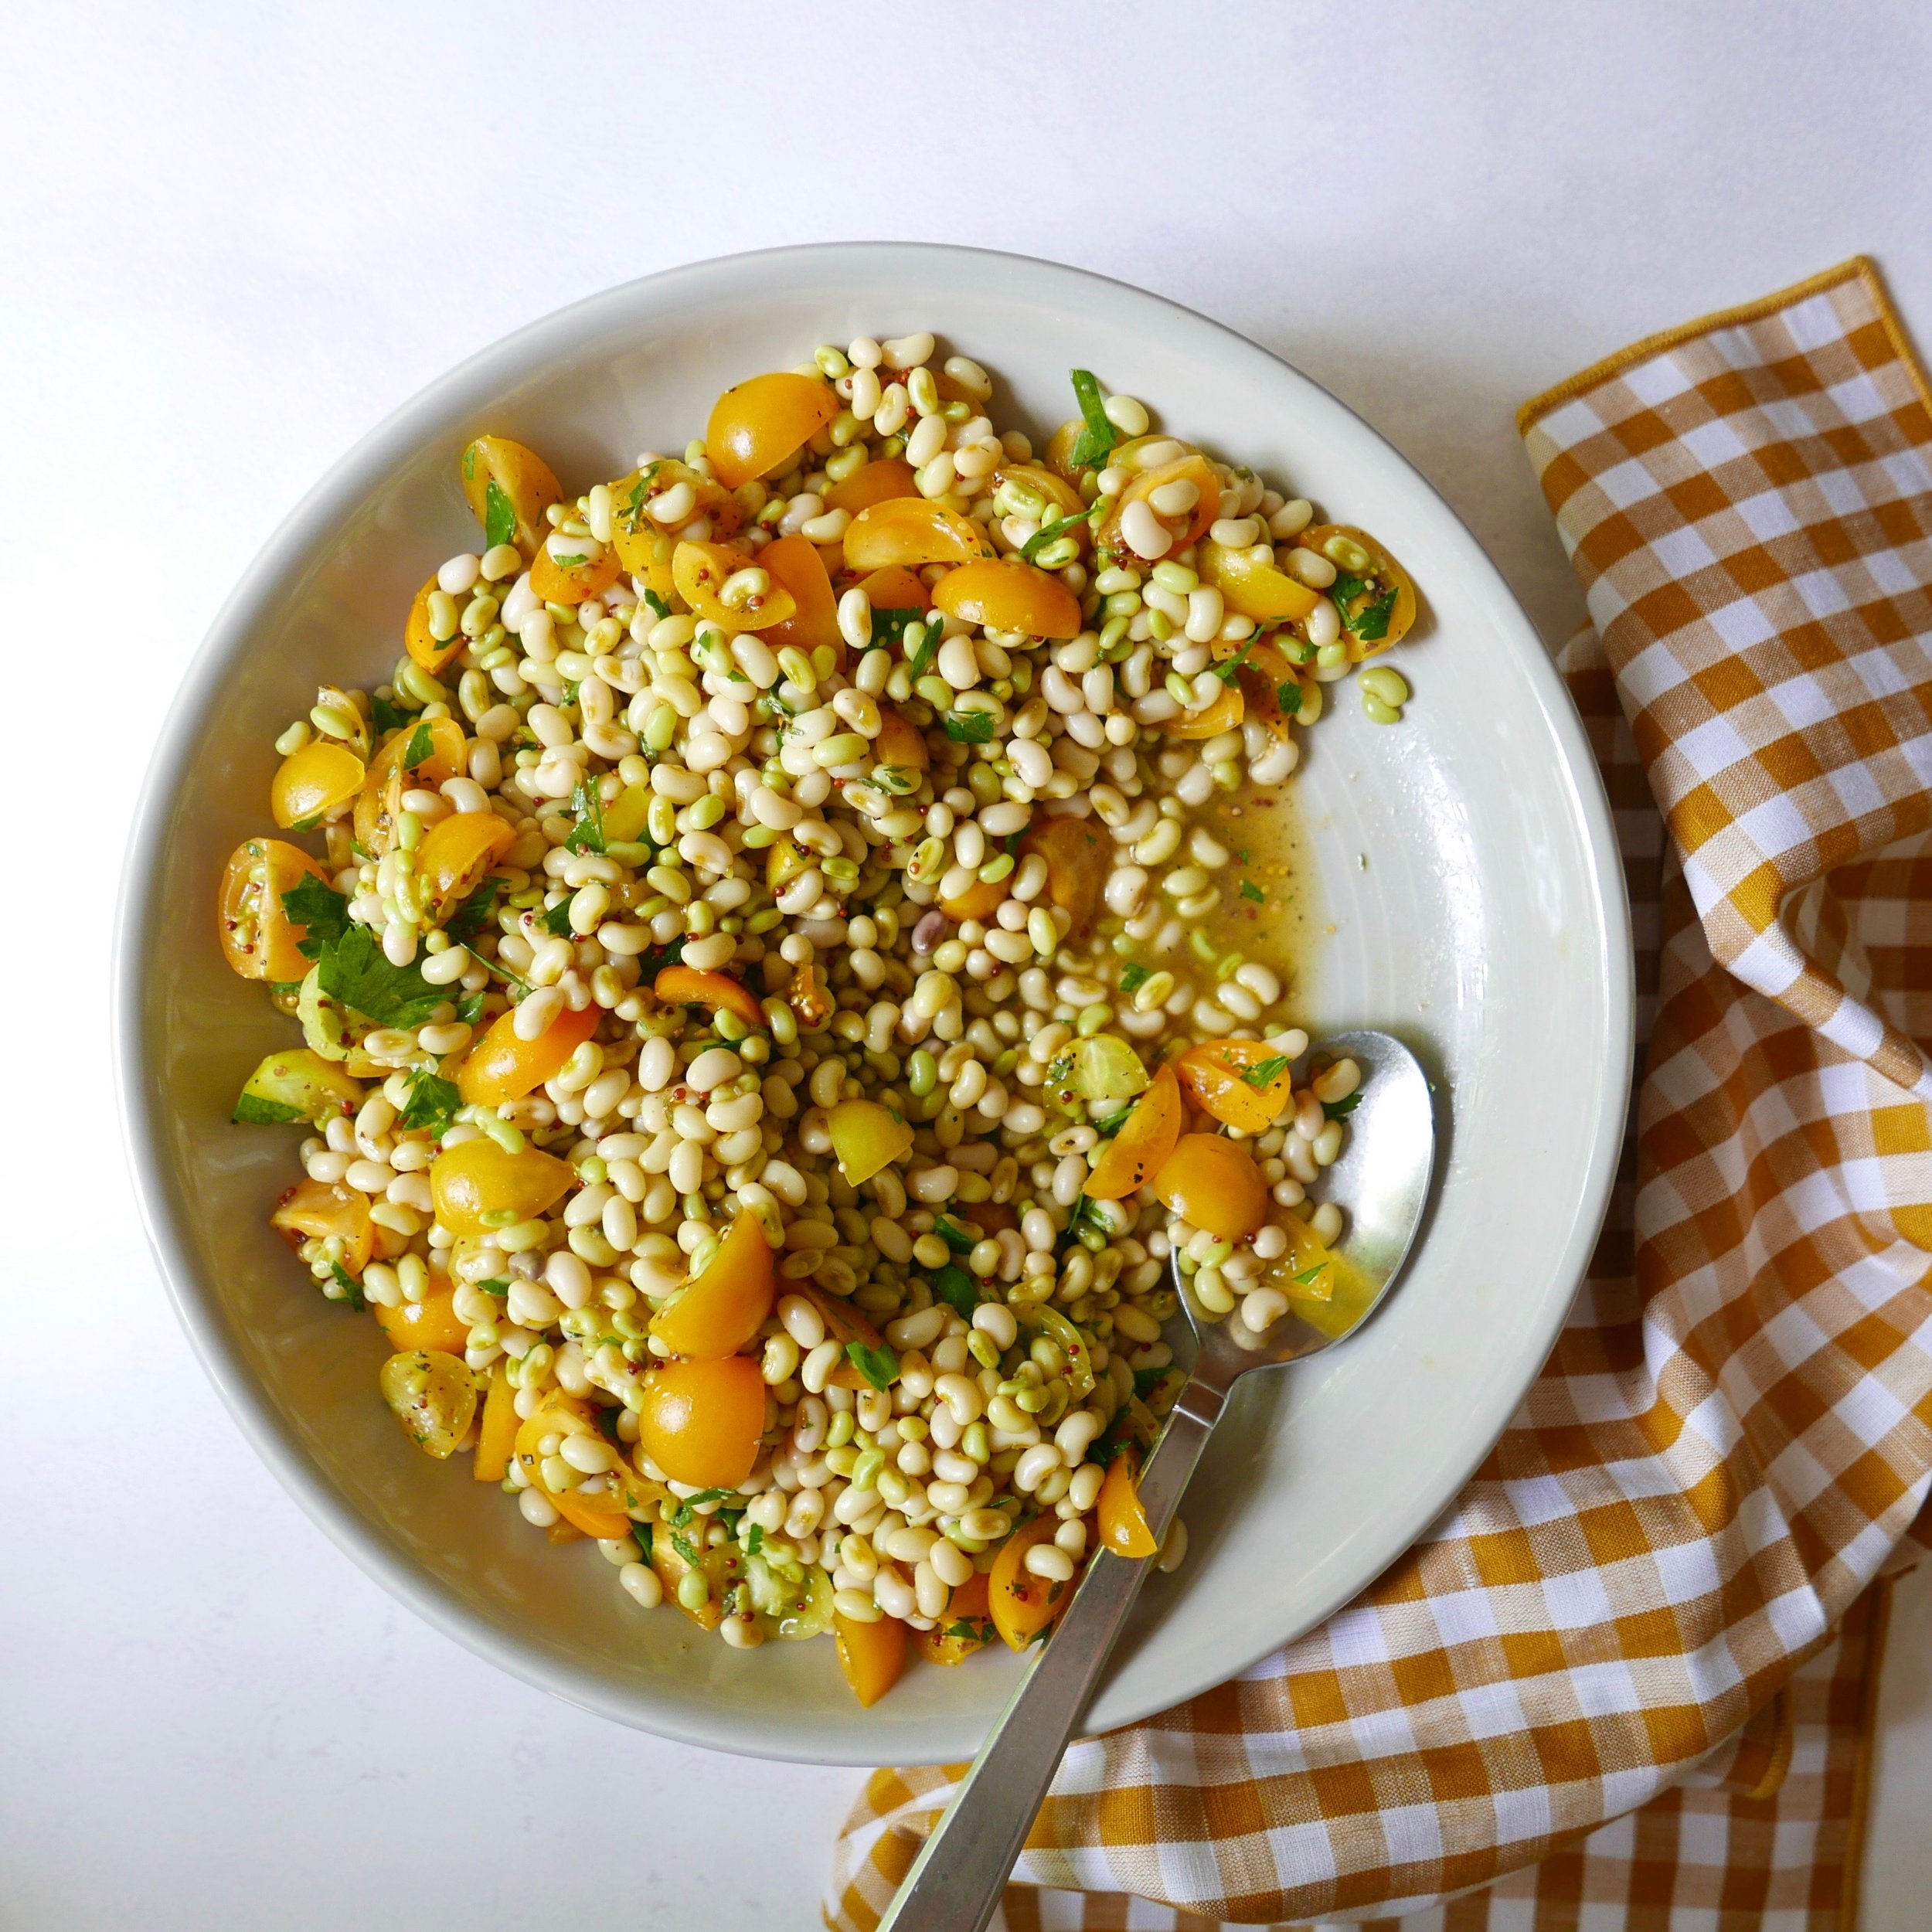
One of my favorite things about summer is that fresh Southern field peas are easy to find, at least around Birmingham and other places in the South. One particular type of field pea—lady peas—are probably my all-time favorite summer ingredient, and I love to cook up a pot to serve warm as a side—or turn them into a lovely salad as I’ve done here. It’s a versatile side, full of fresh summer flavor. It goes on repeat around here all throughout the season. Be sure to scroll below for more info on lady peas.

Yield: 6 (serving size: about 1 scant cup)
Author: Ann Taylor Pittman

Lady Pea and Tomato Salad

prep time: 15 Mcook time: 20 Mtotal time: 35 M
This is one of my all-time favorite summer sides. Why? Because it goes with anything (burgers, steaks, grilled fish, seared scallops), because I can make it ahead and serve it at room temperature, and because it just tastes so good--clean, simple, wonderful flavors. See below for more info on lady peas. If you can't find them, you can sub fresh lima beans.

ingredients:

  • 1 lb. fresh shelled lady peas (see note below)
  • 4 cups water
  • 2 bay leaves
  • 3 thyme sprigs
  • 2 cups quartered cherry tomatoes (I used yellow ones)
  • 3/4 tsp. kosher salt, divided
  • 1/2 tsp. freshly ground black pepper, divided
  • 2 Tbsp. extra-virgin olive oil
  • 1 Tbsp. red wine vinegar
  • 1 Tbsp. whole-grain Dijon mustard
  • 2 tsp. chopped fresh thyme

instructions:

How to cook Lady Pea and Tomato Salad

  1. Combine peas, water, bay leaves, and thyme sprigs in a large saucepan. Bring to a boil over high heat. Reduce heat, and simmer until peas reach desired degree of tenderness, 20 to 30 minutes. Drain peas and rinse with cold water. Discard bay leaves and thyme sprigs.
  2. Meanwhile, combine tomatoes, 1/2 teaspoon salt, and 1/4 teaspoon pepper; let stand 20 minutes while peas cook.
  3. Combine remaining 1/4 teaspoon salt, remaining 1/4 teaspoon pepper, oil, vinegar, mustard, and chopped thyme in a small jar; shake well until emulsified. 
  4. Combine peas, tomatoes and all their juices, and dressing in a large bowl; toss well to combine. Serve chilled or at room temperature. 

NOTES:

Calories 126; Fat 5g (sat1 g); Protein5 g; Carb 15g; Fiber 5g; Sugars 4g (added sugars 0g); Sodium 156mg
Created using The Recipes Generator

About Lady Peas

Lady peas are a type of Southern field pea with a clean flavor and less-starchy texture than other varieties, such as crowder peas or pink-eye peas/purple hull peas. They have a delicate flavor and wonderful creamy texture that is just something special. If I’m cooking up a pot to enjoy as a warm side dish, I’ll first sauté onions, then add the peas, bay leaves, thyme sprigs, and chicken stock to cover. Once the peas reach the level of tenderness I like, I’ll take them off the stove and just let them sit for a bit. I find that this step (letting them rest) produces amazing results—the creamiest texture throughout. For this salad, though, I like to keep the texture a teensy bit firmer, so I skip that step. Here’s what shelled lady peas look like:

P1110278.jpeg

Aren’t they pretty? Well, I think they are. I can usually find them easily from June till late July at farmers markets and farm stands. Here’s a little more about lady peas from the good folks at Southern Living, if you care to learn more about them. If I can ever find them still in their pods (surprisingly hard to find), I snatch them up—because shelling peas is one of my favorite things to do.

You can turn this salad into a main by adding some protein—some grilled chicken or shrimp, sliced steak, or my favorite, seared scallops:

P1110308.jpeg

Beet and Cherry Salad with Pistachio-Mint Gremolata

P1110297.jpeg

A few weeks back, I played with a monochromatic golden beet and mango salad. It was so stinking good that I thought, welp, why not try a monochromatic red beet salad? So I paired the earthy roots with sweet Bing cherries, and it was a match made in heaven! As always, I give you the recipe up front here, and the notes and tips are below.

Yield: 4 (serving size: about 1 cup)
Author: Ann Taylor Pittman

Beet and Cherry Salad with Pistachio-Mint Gremolata

prep time: 30 Mcook time: 6 Mtotal time: 36 M
Wow, what a great combo! Sweet, juicy cherries and earthy beets form a gorgeously monochromatic base for a salad featuring a lovely whiff of cardamom in its dressing. The pistachio-mint-lemon gremolata offers a pop of contrasting color, crunch, and flavor. I use a quick microwave method to "roast" the beets, so the salad comes together quickly. You can make the salad and the gremolata a day or two ahead; just store them separately until ready to serve.

ingredients:

  • 1 lb. small trimmed beets (for me, this was 6 beets)
  • 1 lb. sweet cherries
  • 2 Tbsp. extra-virgin olive oil
  • 1 1/2 Tbsp. white balsamic vinegar
  • 1 tsp. Dijon mustard
  • 1 tsp. honey
  • 1/2 tsp. kosher salt
  • 1/4 tsp. freshly ground black pepper
  • 1/8 tsp. ground cardamom
  • 1/4 cup chopped unsalted roasted pistachios
  • 1 Tbsp. finely chopped fresh mint
  • 1 1/2 tsp. grated lemon zest (from 1 large lemon)

instructions:

How to cook Beet and Cherry Salad with Pistachio-Mint Gremolata

  1. Pierce each beet once with the tip of a small knife. Place beets on a large sheet of microwave-safe parchment paper; wrap tightly. Microwave on HIGH for 6 minutes or until beets are tender. (If your beets are larger than mine were, they will take longer. Go in 1-minute increments until they reach the desired tenderness.) Cool beets slightly; trim off stem end, and remove skins. Cut beets into thin wedges.
  2. Meanwhile, pit cherries, and cut in half. 
  3. Combine oil, vinegar, mustard, honey, salt, pepper, and cardamom in a small jar; seal and shake well until emulsified. Combine beets and cherries in a large bowl. Drizzle with dressing; toss gently to coat.
  4. Combine pistachios, mint, and lemon zest; sprinkle over salad just before serving.

NOTES:

Calories 209; Fat11 g (sat 1g); Protein 4g; Carb 29g; Fiber 6g; Sugars 19g (added sugars 2g); Sodium 241mg
Created using The Recipes Generator

How to Microwave-Roast Beets

First, try to use small beets for even, quick cooking. Mine were between two and three ounces each. Pierce each beet once with the tip of a sharp knife, and place on a large sheet of microwave-safe parchment paper.

P1110288.jpeg

Wrap the beets tightly in the parchment paper, folding over the edges to create a good seal, and turn the package so the seams are on the bottom. Microwave like this for six minutes (or longer if your beets are larger).

P1110289.jpg

Once the beets are done, let them cool down until they’re cool enough to handle. Then you can cut off the stem end and peel off the skins.

P1110294.jpg

My Favorite Cherry Pitter

Trust me: If you make a cherry pie or cobbler or salad at least once a year, you should invest in a cherry pitter. It makes the job of loosening and removing those suckers So. Much. Easier. I love the one pictured below, which I’ve had for 10+ years. It’s made by Oxo, and it does the job really well. And the splatter guard keeps my clothes nice and clean—which means a lot to me, because I never wear an apron.

P1110291.jpeg

Golden Beet, Mango, and Avocado Salad

IMG_2715.jpg

Holy cow, this is such a great combo—one that I would not have come up with on my own. See, I had something similar recently in Santa Fe, at the lovely restaurant Paloma. The interplay of creamy avocado, earthy beets, and juicy-sweet mango was incredible … inspiring … memorable. I believe their salad was topped with pepitas, but I went with pine nuts for mine, along with a sprinkling of Tajin seasoning for zesty flavor and a hint of chile richness. Check out the recipe below, and then scroll down for beet and mango tips/how-tos.

Yield: 4 servings (serving size: about 1 cup)
Author:

Golden Beet, Mango, and Avocado Salad

prep time: 10 Mcook time: 1 hourtotal time: 1 H & 10 M
Wow, what a trio: Earthy, tender golden beets, juicy-sweet mango, and creamy avocado come together with a barely-there dressing (the ingredients are so good that they need little embellishment). Each serving boasts a hefty 7 grams of fiber, too. Serve alongside tacos, enchiladas, grilled chicken, or seared steak.

ingredients:

  • 1 lb. trimmed golden beets (about 4 medium)
  • 1 mango
  • 1 1/2 Tbsp. fresh lime juice
  • 1 Tbsp. extra-virgin olive oil
  • 1/4 tsp. kosher salt
  • 1 ripe, firm avocado
  • 2 Tbsp. toasted pine nuts
  • 2 Tbsp. fresh cilantro leaves
  • 1 tsp. Tajin seasoning (see note below)

instructions:

How to cook Golden Beet, Mango, and Avocado Salad

  1. Preheat oven to 425°F.
  2. Wrap trimmed beets in heavy-duty foil. Roast at 425°F until tender when pierced with a knife, about 1 hour. Let stand until cool enough to handle. Rub off and discard skins. Cut each beet into 8 wedges.
  3. Peel mango (a sharp paring knife works well for this). Carefully cut both mango "cheeks" from pit (see photos below). Slice mango cheeks crosswise.
  4. Place beet wedges and mango slices in a medium bowl. Drizzle with lime juice and oil, and sprinkle with salt. Toss gently to combine. 
  5. Peel and pit avocado; cut crosswise into slices. Arrange avocado and beet-mango mixture  on a platter. Sprinkle evenly with pine nuts, cilantro, and Tajin. 

NOTES:

Calories 221; Fat 12g (sat 2g); Protein 4g; Carb 28g; Fiber 7g; Sugars 20g (added sugars 0g); Sodium 350mg
Created using The Recipes Generator

How to Roast Beets

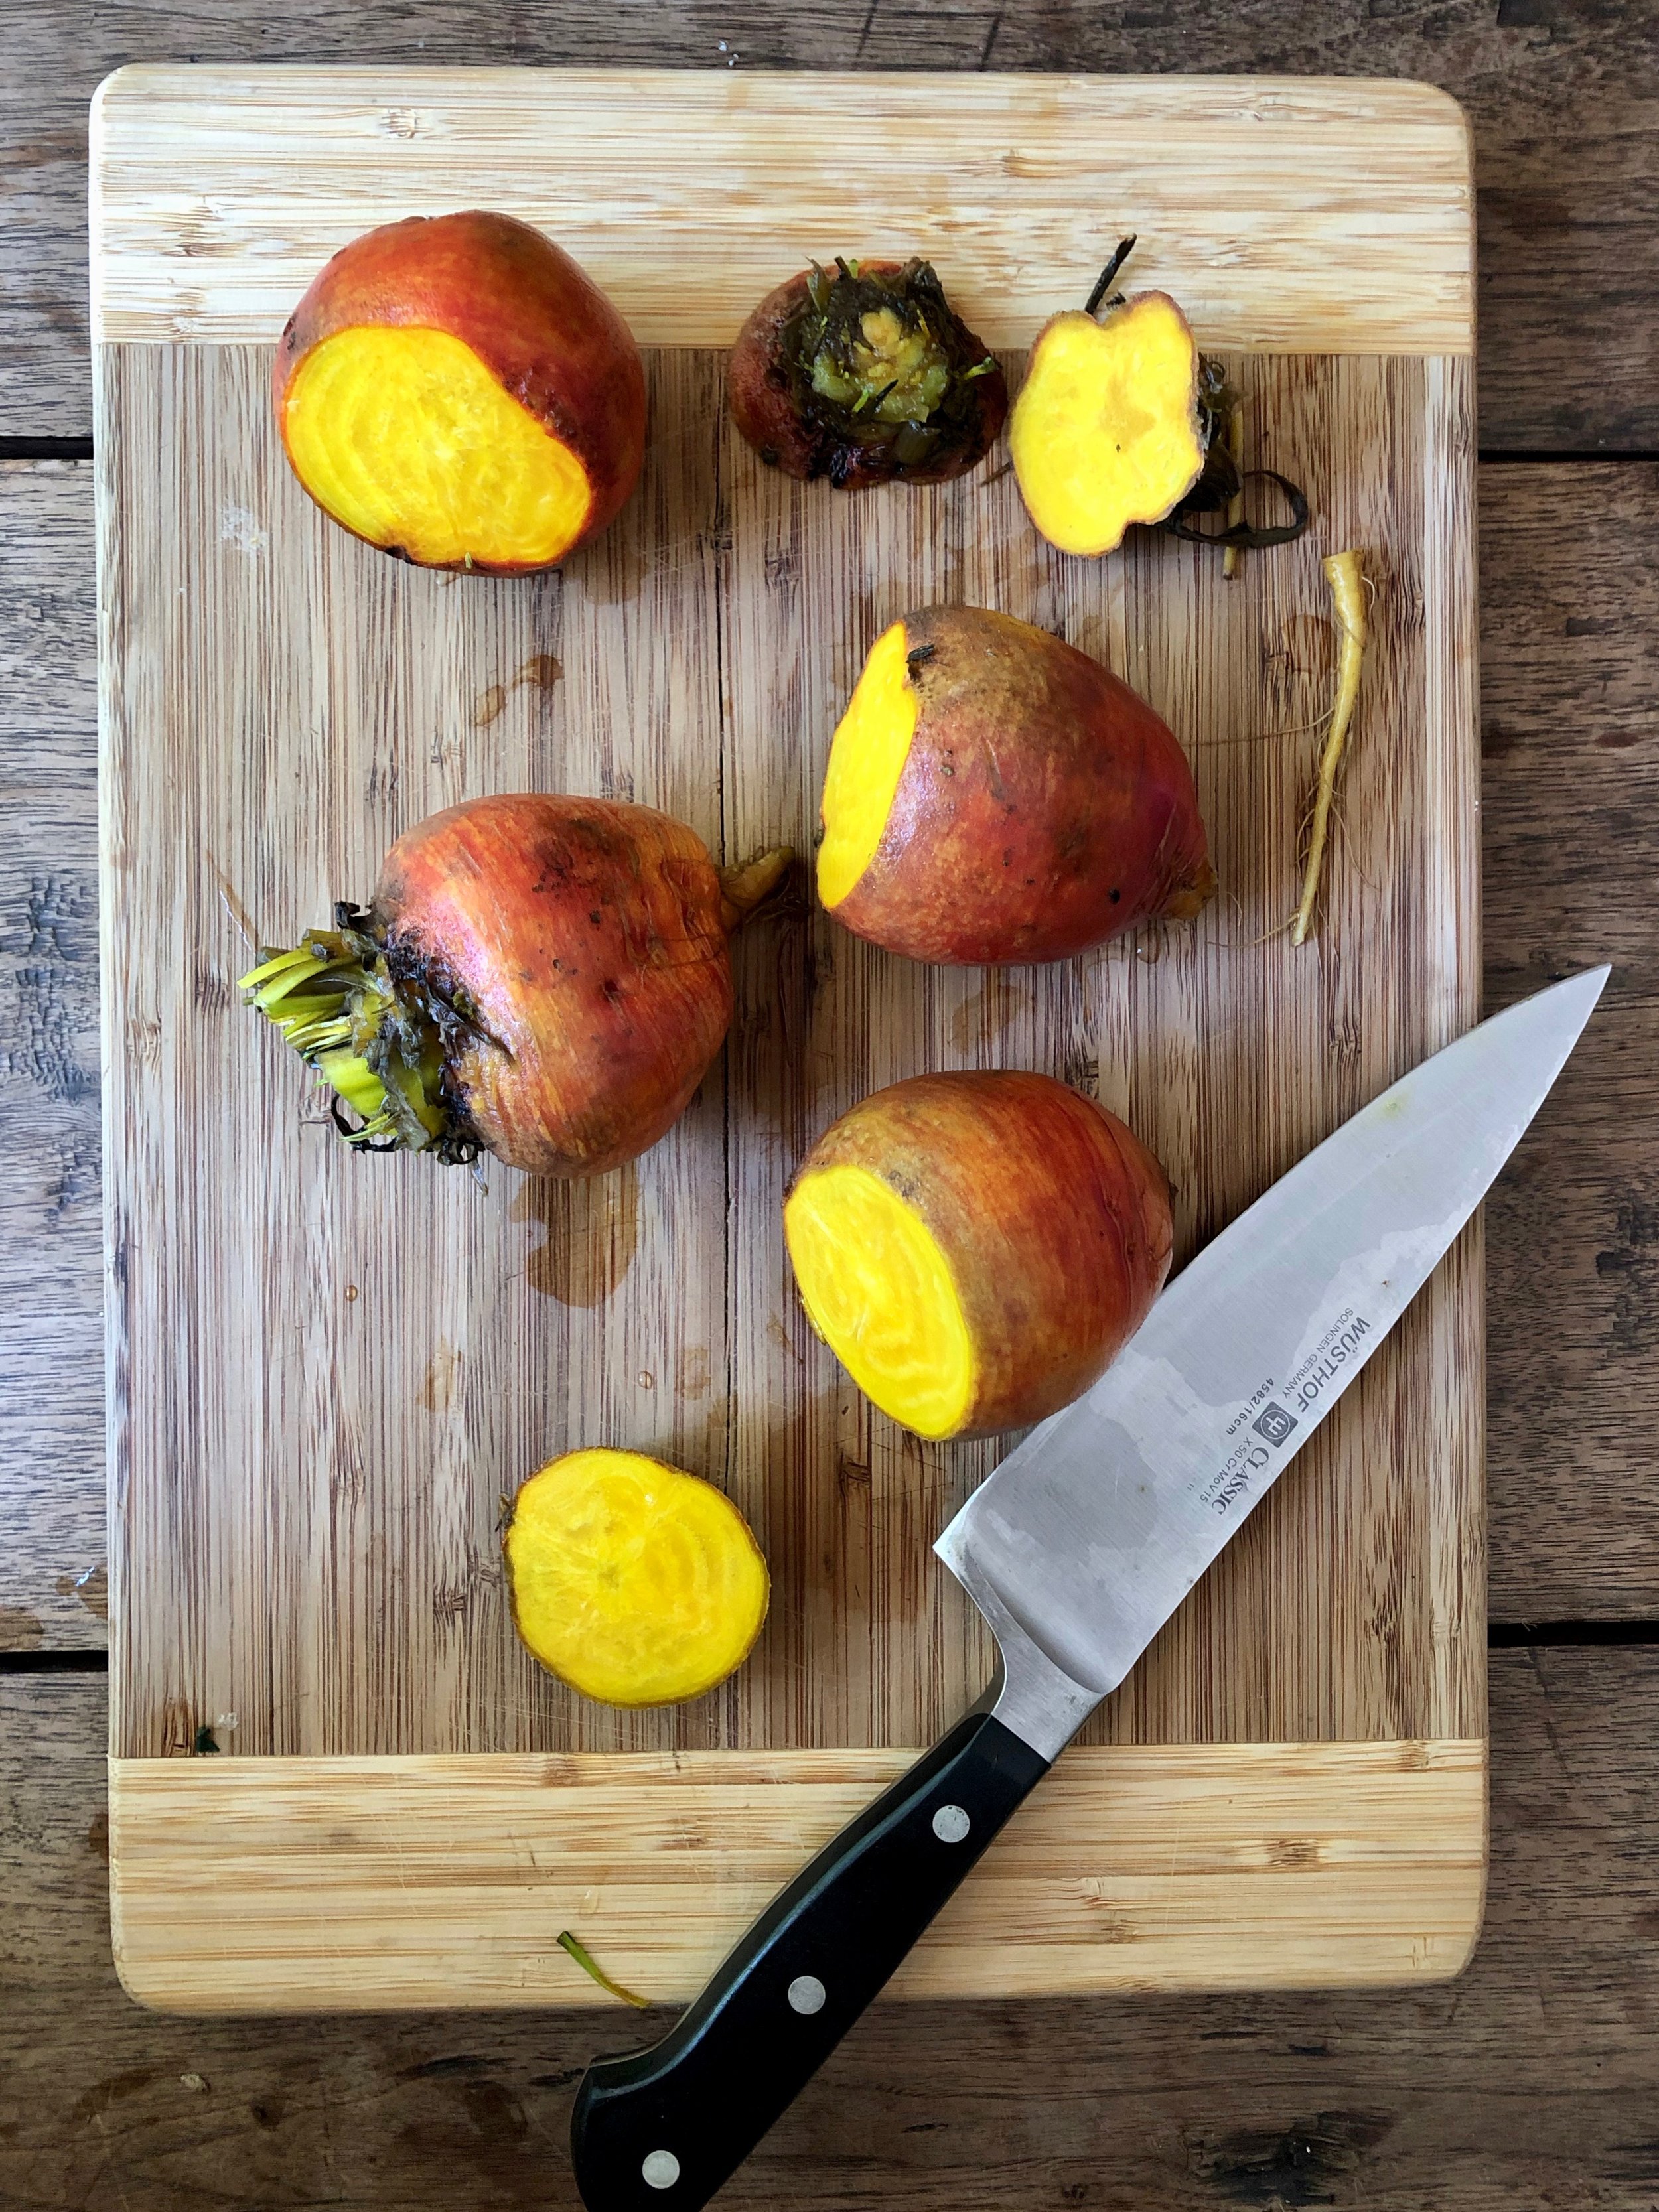
My favorite way to cook beets is to wrap them in foil and roast them in the oven. If you are pressed for time, though, you can wrap the beets in microwave-safe parchment paper and microwave on HIGH for 6 to 10 minutes. They won’t be quite as tender and moist, but they’ll still be good. Anyway, here’s how I roast in the oven. First, trim the tops of the beets and cut away any “tails.”

IMG_2689.jpeg

Then wrap the trimmed beets tightly in foil.

IMG_2691.jpeg

When the beets are done and have cooled off a bit, you can easily remove the skin. I like to use a paper towel to rub off the skins. Here, you can see little bits of skin in the foil; they just rub off easily, leaving a shiny, smooth peeled beet behind.

IMG_2696.jpeg

Then simply cut each beet into into 8 wedges (and try not to gobble them all up).

IMG_2701.jpeg

How to Cut a Mango

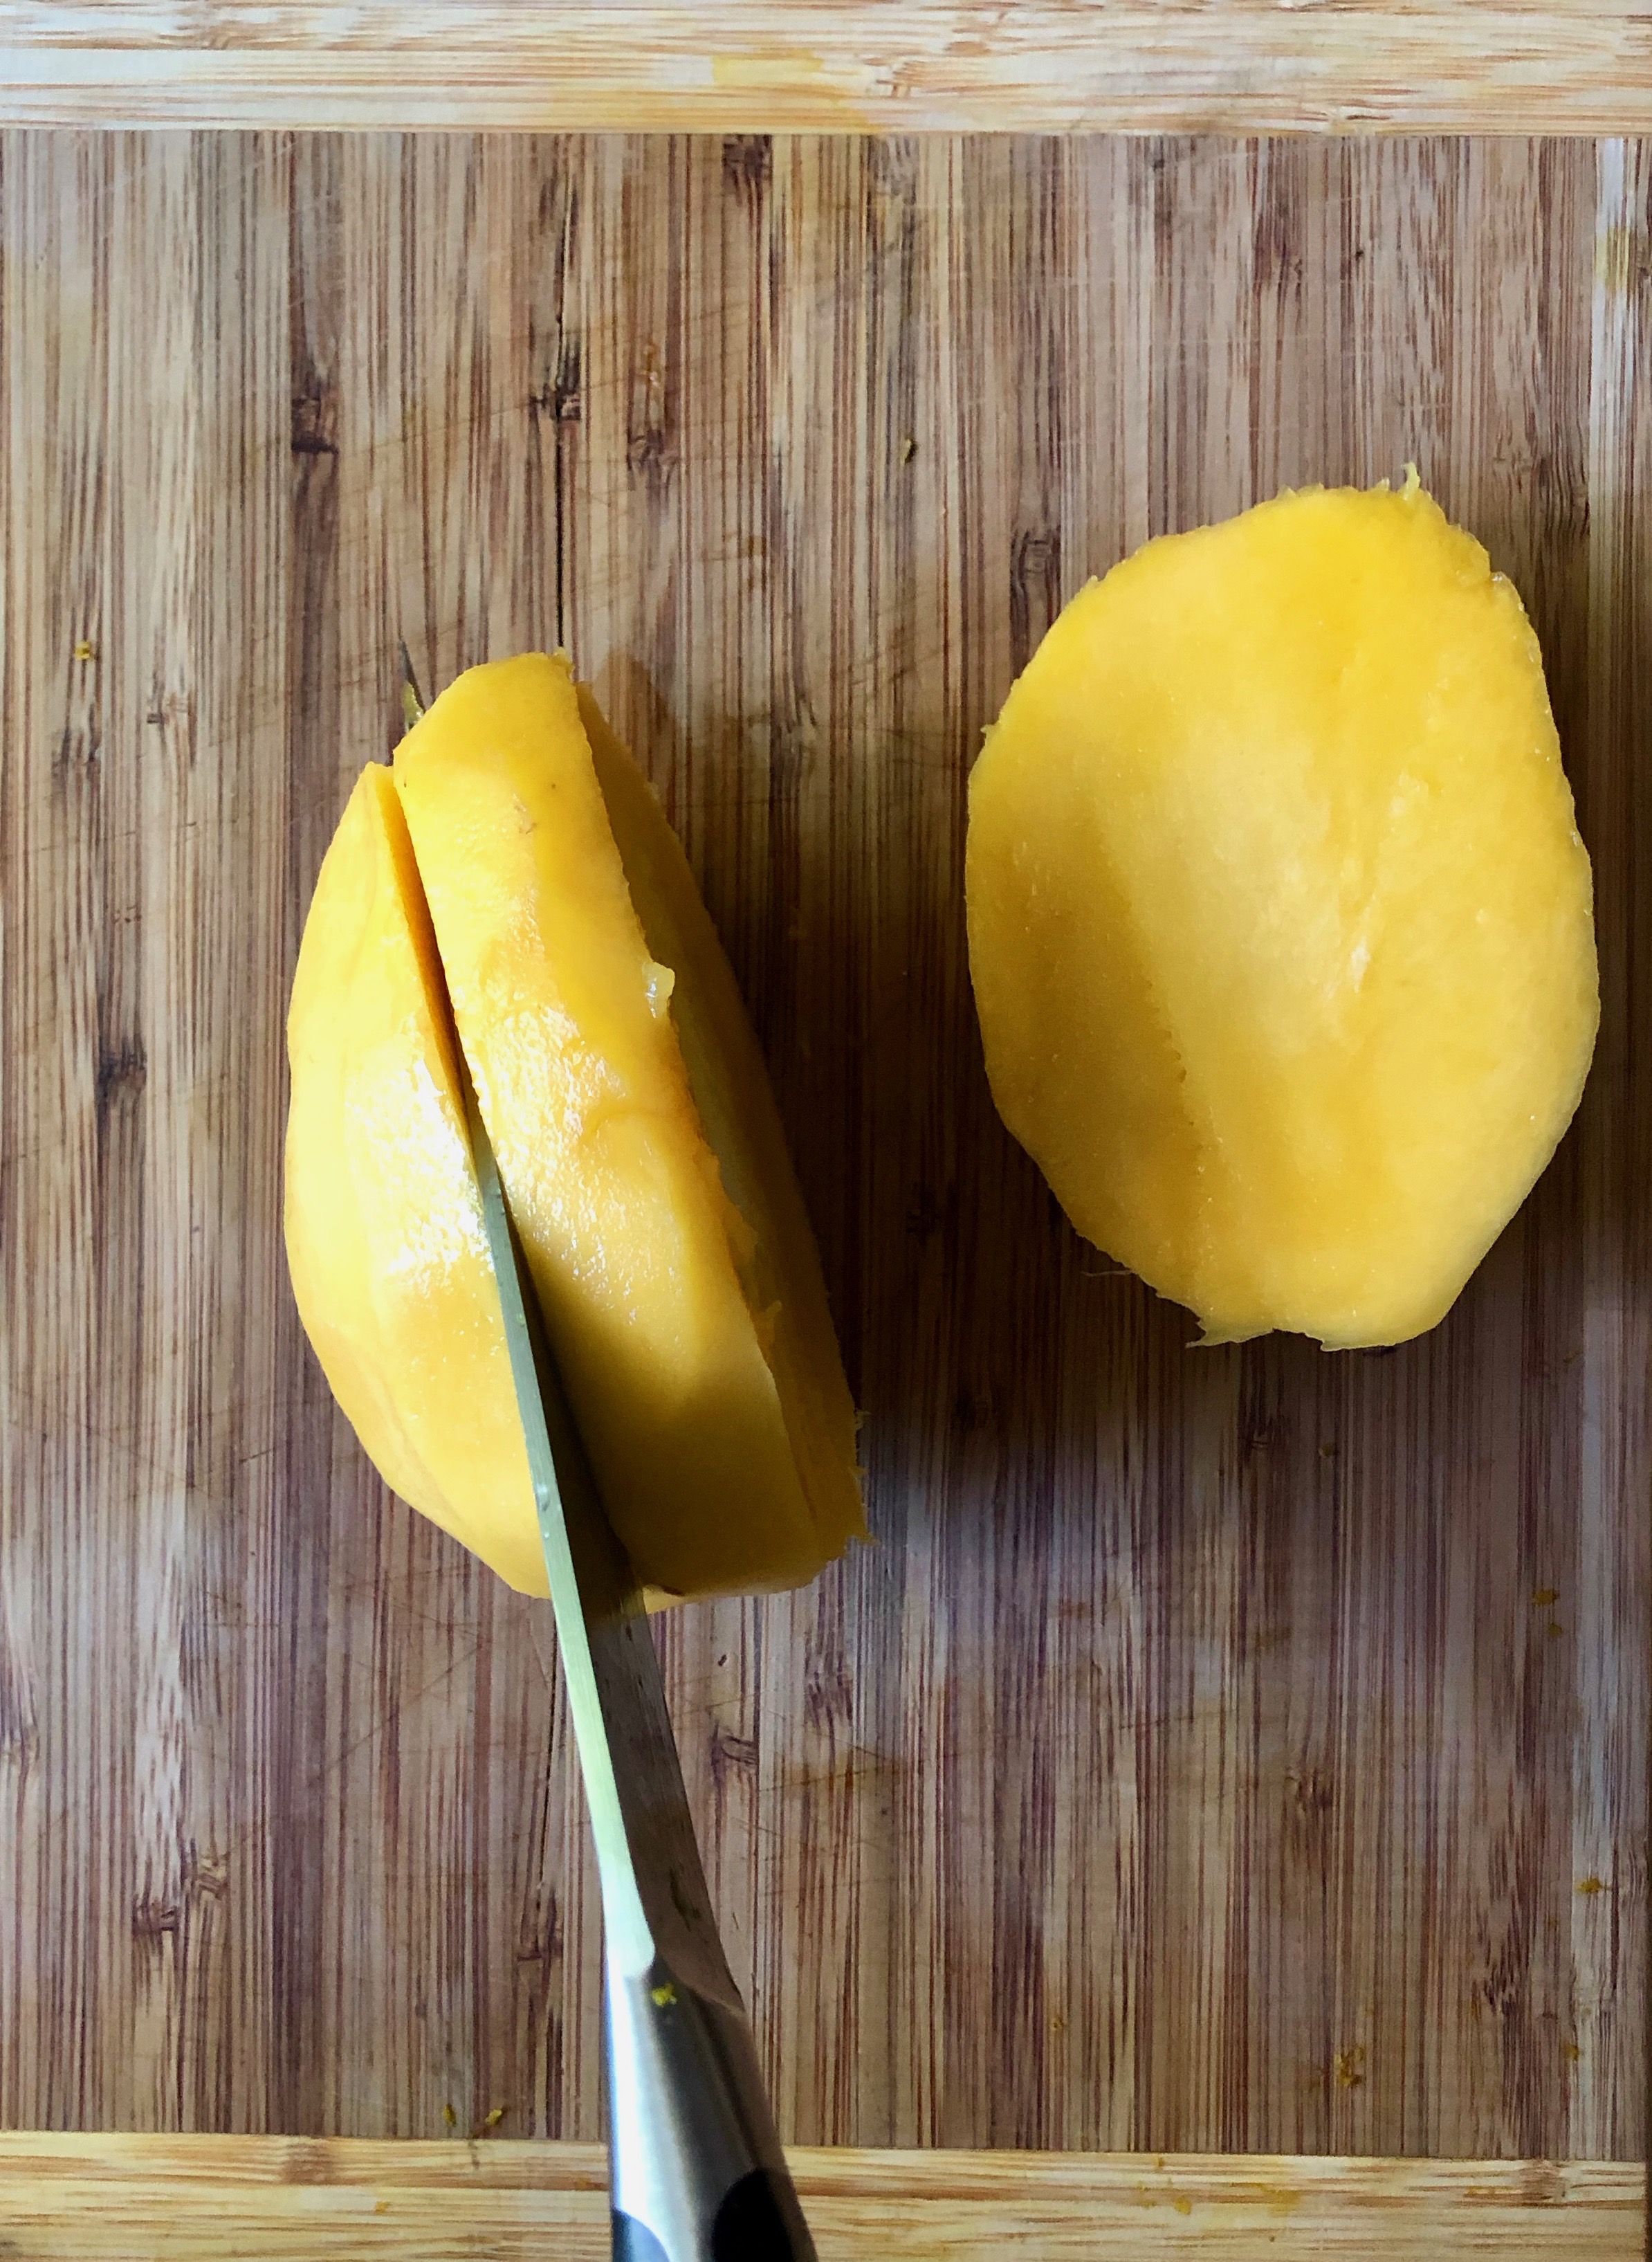
I know there are all kinds of tutorials online that show how to cut a mango. To me, the fastest, easiest way is to peel the entire mango and then cut off both “cheeks.” Holding the peeled mango (a paper towel might help you get a better grip—the peeled mango will be slippery) so that a narrower side is pointing up, slice somewhere between 1/4 inch and 1/2 inch from the middle. The pit will announce where it is, and your knife can just graze it as you cut down.

IMG_2702.jpeg

And then cut off the other cheek, on the other side of the pit. Once the cheeks are off, you can slice ‘em, cube ‘em, or keep ‘em whole.

IMG_2704.jpeg

I sprinkle this salad with Tajin seasoning. If you’re not familiar with it, it’s a combo of dried chile, dehydrated lime, and sea salt. It’s tangy, it’s salty, and it’s roasty-toasty with the essence of chiles but not necessarily the heat. It is absolutely delicious sprinkled over mango or watermelon or pineapple, used to rim a margarita glass, tossed with popcorn, or dusted over grilled chicken or beef. You’ll find it with the Mexican or Latin American foods in most supermarkets, and you’ll be glad you did!

IMG_2709.jpeg

Herby Buttermilk Ranch Dressing

IMG_0622.jpeg

Everyone needs a good recipe for great ranch dressing, right? This one is easy, fresh, and packed with flavor. It’s really good served very cold—either draped over crisp greens or as a dip for veggies. My current favorite way to have it is shown above: a simple iceberg (yes!) salad with sliced grape tomatoes and bacon. Simple can be so good.

Yield: 8 servings (serving size: 2 tablespoons)

Herby Buttermilk Ranch Dressing

prep time: 10 minscook time: total time: 10 mins

Confession: I like ranch dressing. Not the bottled stuff, which I think is pretty bland. No, I mean homemade buttermilk ranch. I like it loaded with fresh herbs and with a little bite from fresh garlic, which is what makes it so good. I also like it served very cold over equally cold crisp greens like romaine (when it's not being recalled), Little Gem lettuce, or iceberg lettuce, which I've recently rediscovered. The recipe here is for the dressing alone; the salad shown is just a serving suggestion. You might want to go ahead and double the recipe; it's a good thing to keep on hand.

ingredients:

  • 1/2 cup whole buttermilk
  • 1/2 cup mayonnaise (I use Duke's; I'm Southern...)
  • 2 Tbsp. chopped fresh chives
  • 1 Tbsp. chopped fresh dill
  • 1 Tbsp. apple cider vinegar
  • 2 tsp. chopped fresh thyme
  • 1/2 tsp. kosher salt
  • 1/2 tsp. freshly ground black pepper
  • 1 small garlic clove, grated on a Microplane

instructions:

  1. Place all ingredients in a medium bowl; whisk until well combined. I like to chill mine until very cold before serving, about an hour or so.

NOTES:

Calories 111; Fat 12g (sat 2g); Protein 1g; Carb 1g; Fiber 0g; Sugars 1g (added sugars 0g); Sodium 183mg
Created using The Recipes Generator

Kale Salad with Pears, Pomegranates, and Pickled Onions

IMG_0445.jpeg

Every Thanksgiving table should include a big, fresh salad. With all the rich casseroles, gravy, and savory (and sometimes surprisingly sweet) sides, something fresh is a necessity. Whenever I bust up a big salad into the Turkey Day mix, I’m often met with jokes and gentle ribbing. But you know what? My salad always gets eaten. Every freaking leaf. This is a great one for Thanksgiving or Friendsgiving because it can easily accommodate dietary needs and restrictions: It’s vegan and gluten-free, and if someone has a nut allergy, you can easily omit the pecans.

Yield: 8 (serving size: about 1½ cups)

Kale Salad with Pears, Pomegranates, and Pickled Onions

prep time: 35 minscook time: 5 minstotal time: 40 mins

I have a real problem with lame salads, those that feel like an afterthought. Salads, after all, are a great opportunity to play with texture, flavor, and color, bringing all those elements into harmonious balance. This one does just that, combining earthy-chewy lacinato kale, sweet-juicy pears, toasty-crunchy pecans, and tart-crisp pickled onions. I happened upon a bag of petite Seckel pears at my local Publix store, which I think makes this salad feel a little special—but any sweet pear will work beautifully here. You don’t have to cut them the way I did (using a mandoline); you can just quarter, core, and thinly wedge or slice them. See below for tips and technique photos.

ingredients:

  • 1 cup mirin (sweet rice wine—see photo below)
  • ½ cup natural rice vinegar
  • 1 medium red onion, vertically sliced

  • 2 (8-oz.) bunches lacinato kale
  • 3 Seckel pears or 1½ Bartlett or Anjou pears, thinly sliced
  • ½ cup pomegranate arils (about ½ large pomegranate)
  • ½ cup pecan halves, toasted
  • 6 Tbsp. extra-virgin olive oil, divided
  • 3 Tbsp. natural rice vinegar
  • 1 Tbsp. maple syrup
  • 1 Tbsp. whole-grain Dijon mustard
  • ¾ tsp. kosher salt
  • ½ tsp. black pepper
  • 1 small garlic clove, grated on a Microplane

instructions:

  1. Combine mirin and ½ cup vinegar in a small saucepan; bring to a boil. Add onion; return to a boil, and immediately remove from heat. Let stand 30 minutes or until cooled to room temperature. You can make the pickled onions a week ahead; refrigerate in an airtight container. 

  2. Meanwhile, remove stems from kale and discard. Tear leaves into pieces. Place kale in a large bowl; drizzle with 1 tablespoon oil. Massage oil into kale leaves until leaves slightly wilt. Add pears, pomegranate, and pecans to kale; toss gently to combine. Remove half of onion from mirin mixture with a slotted spoon; add to salad. (Reserve remaining onion for another use) 

  3. Combine remaining 5 tablespoons oil, 3 tablespoons vinegar, syrup, mustard, salt, pepper, and garlic in a jar; close with lid, and shake until emulsified. Drizzle over salad.

NOTES:

Calories 196; Fat 16g (sat 2g); Protein 3g; Carb 13g; Fiber 3g; Sugars 8g (added sugars 2g); Sodium 168mg
Created using The Recipes Generator

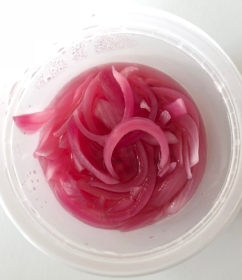
The first step for this salad is to make a batch of pickled onions. I have you make double what you need for the salad—because why not go ahead and use a whole onions?

IMG_0480.jpeg

The leftover pickled onions will hold up well in the fridge for a couple of weeks, and you can use them on tacos, other salads, grain bowls, and more. My easy two-ingredient method relies on two products from the Asian foods aisle: mirin and rice vinegar. These guys:

IMG_0432.jpeg

You can find rice vinegar at any supermarket and mirin at most (I got mine at Target). The mirin is seasoned with salt and sugar plus has a pleasant, light wine flavor—so it takes the place of wine, salt, and sugar. The rice vinegar is softer than many other vinegars, which could make the pickled onions sharp and wince-inducing.

I love lacinato kale for its bumpy texture and earthy and faintly sweet flavor. If you can’t find it, you can use regular curly kale—just know that it’s a little tougher. No matter which you use, do take a minute or two to massage the leaves with a little oil first, to help break down the fibers and tenderize the leaves.

As for the pears, as I mentioned above, I lucked into some gorgeous Seckel pears at the Publix down the road. They come in a bag, like this:

IMG_0436.jpeg

And they’re smaller than most pears. See?

IMG_0438.jpeg

Now for the pomegranates. Look, I know that the arils you can buy in the little cups are very convenient. I’ve used them myself on more than one occasion. But they just don’t taste as good as ones you pull fresh from the whole fruit. I learned a trick that makes that process a little easier. First, cut about 1/4-inch off the top of the fruit, like so:

IMG_0439.jpeg

One you take the “lid” off, you can see where the paper-thin membranes are. It’s a little tricky to see in the photo above, but look for the spoke-like thin white membranes that grow out from the core. You want to score the outer skin of the pomegranate where those membranes run, from the top to the bottom of the fruit, like this:

IMG_0441.jpeg

Once the skin is scored, you can pull apart the fruit. It will break along those “fault lines” like so—

IMG_0442.jpeg

Now you can just gently prod those arils out without having to pick through all the pith and membrane. I swear it’s worth the effort (and there’s not much effort to it).

This salad will fill a big ol’ bowl (meaning it makes a lot). But I predict it will all get happily eaten, with thanksgiving.